Catching Dreams: Dream Catcher Origins and How to Make One
Dreamcatcher Origins and Mythology
Dream catchers have become an icon for Native Americans. While many tribes have a dream catcher mythology, they were originally created by the Ojibwe tribe, so when I decided to include a dream catcher in my modern fairy tale “Smoke Whispers” from my collection When Magic Calls, I made its creator and female lead Ojibwe. This meant I had to do some research.
The dream catcher is associated with Spider Woman, a goddess who watches over many Native American tribes. Traditionally, dream catchers were small talismans made of willow hoops, sinew, and feathers hung above a baby’s cradle to ward off evil.
The round hoop symbolizes the Earth. The beads symbolize either good dreams or Spider Woman, depending on the tribe. The feathers act as soft ladders to guide good dreams to the dreamer, and the web traps bad dreams or evil in general and holds it until the sun rises and destroys the evil.
This is why I included a dream catcher in smoke whispers. Anang decides to insure Dmitri has a pleasant eternal sleep instead of one plagued by nightmares.
I enjoy making dream catchers, so I thought I’d share how I make the owl ones with you. If you make one, please show me by tagging me on social media or emailing me a picture here. If you’d like, I’ll even add your picture (with credits) to this blog post.
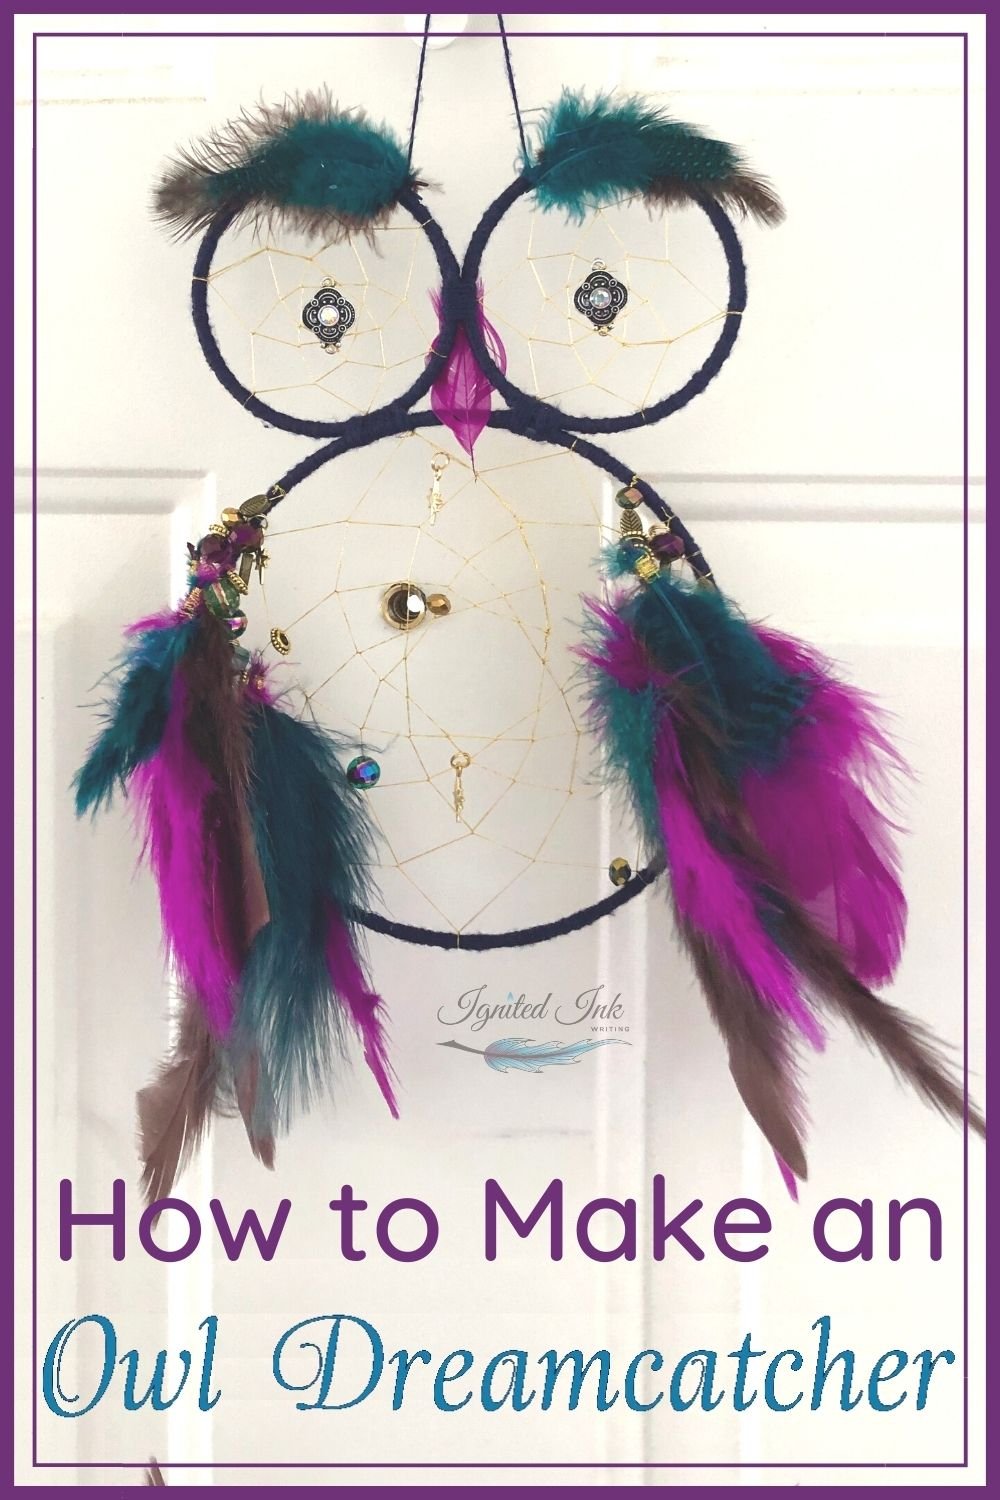
How to Make an Owl Dreamcatcher
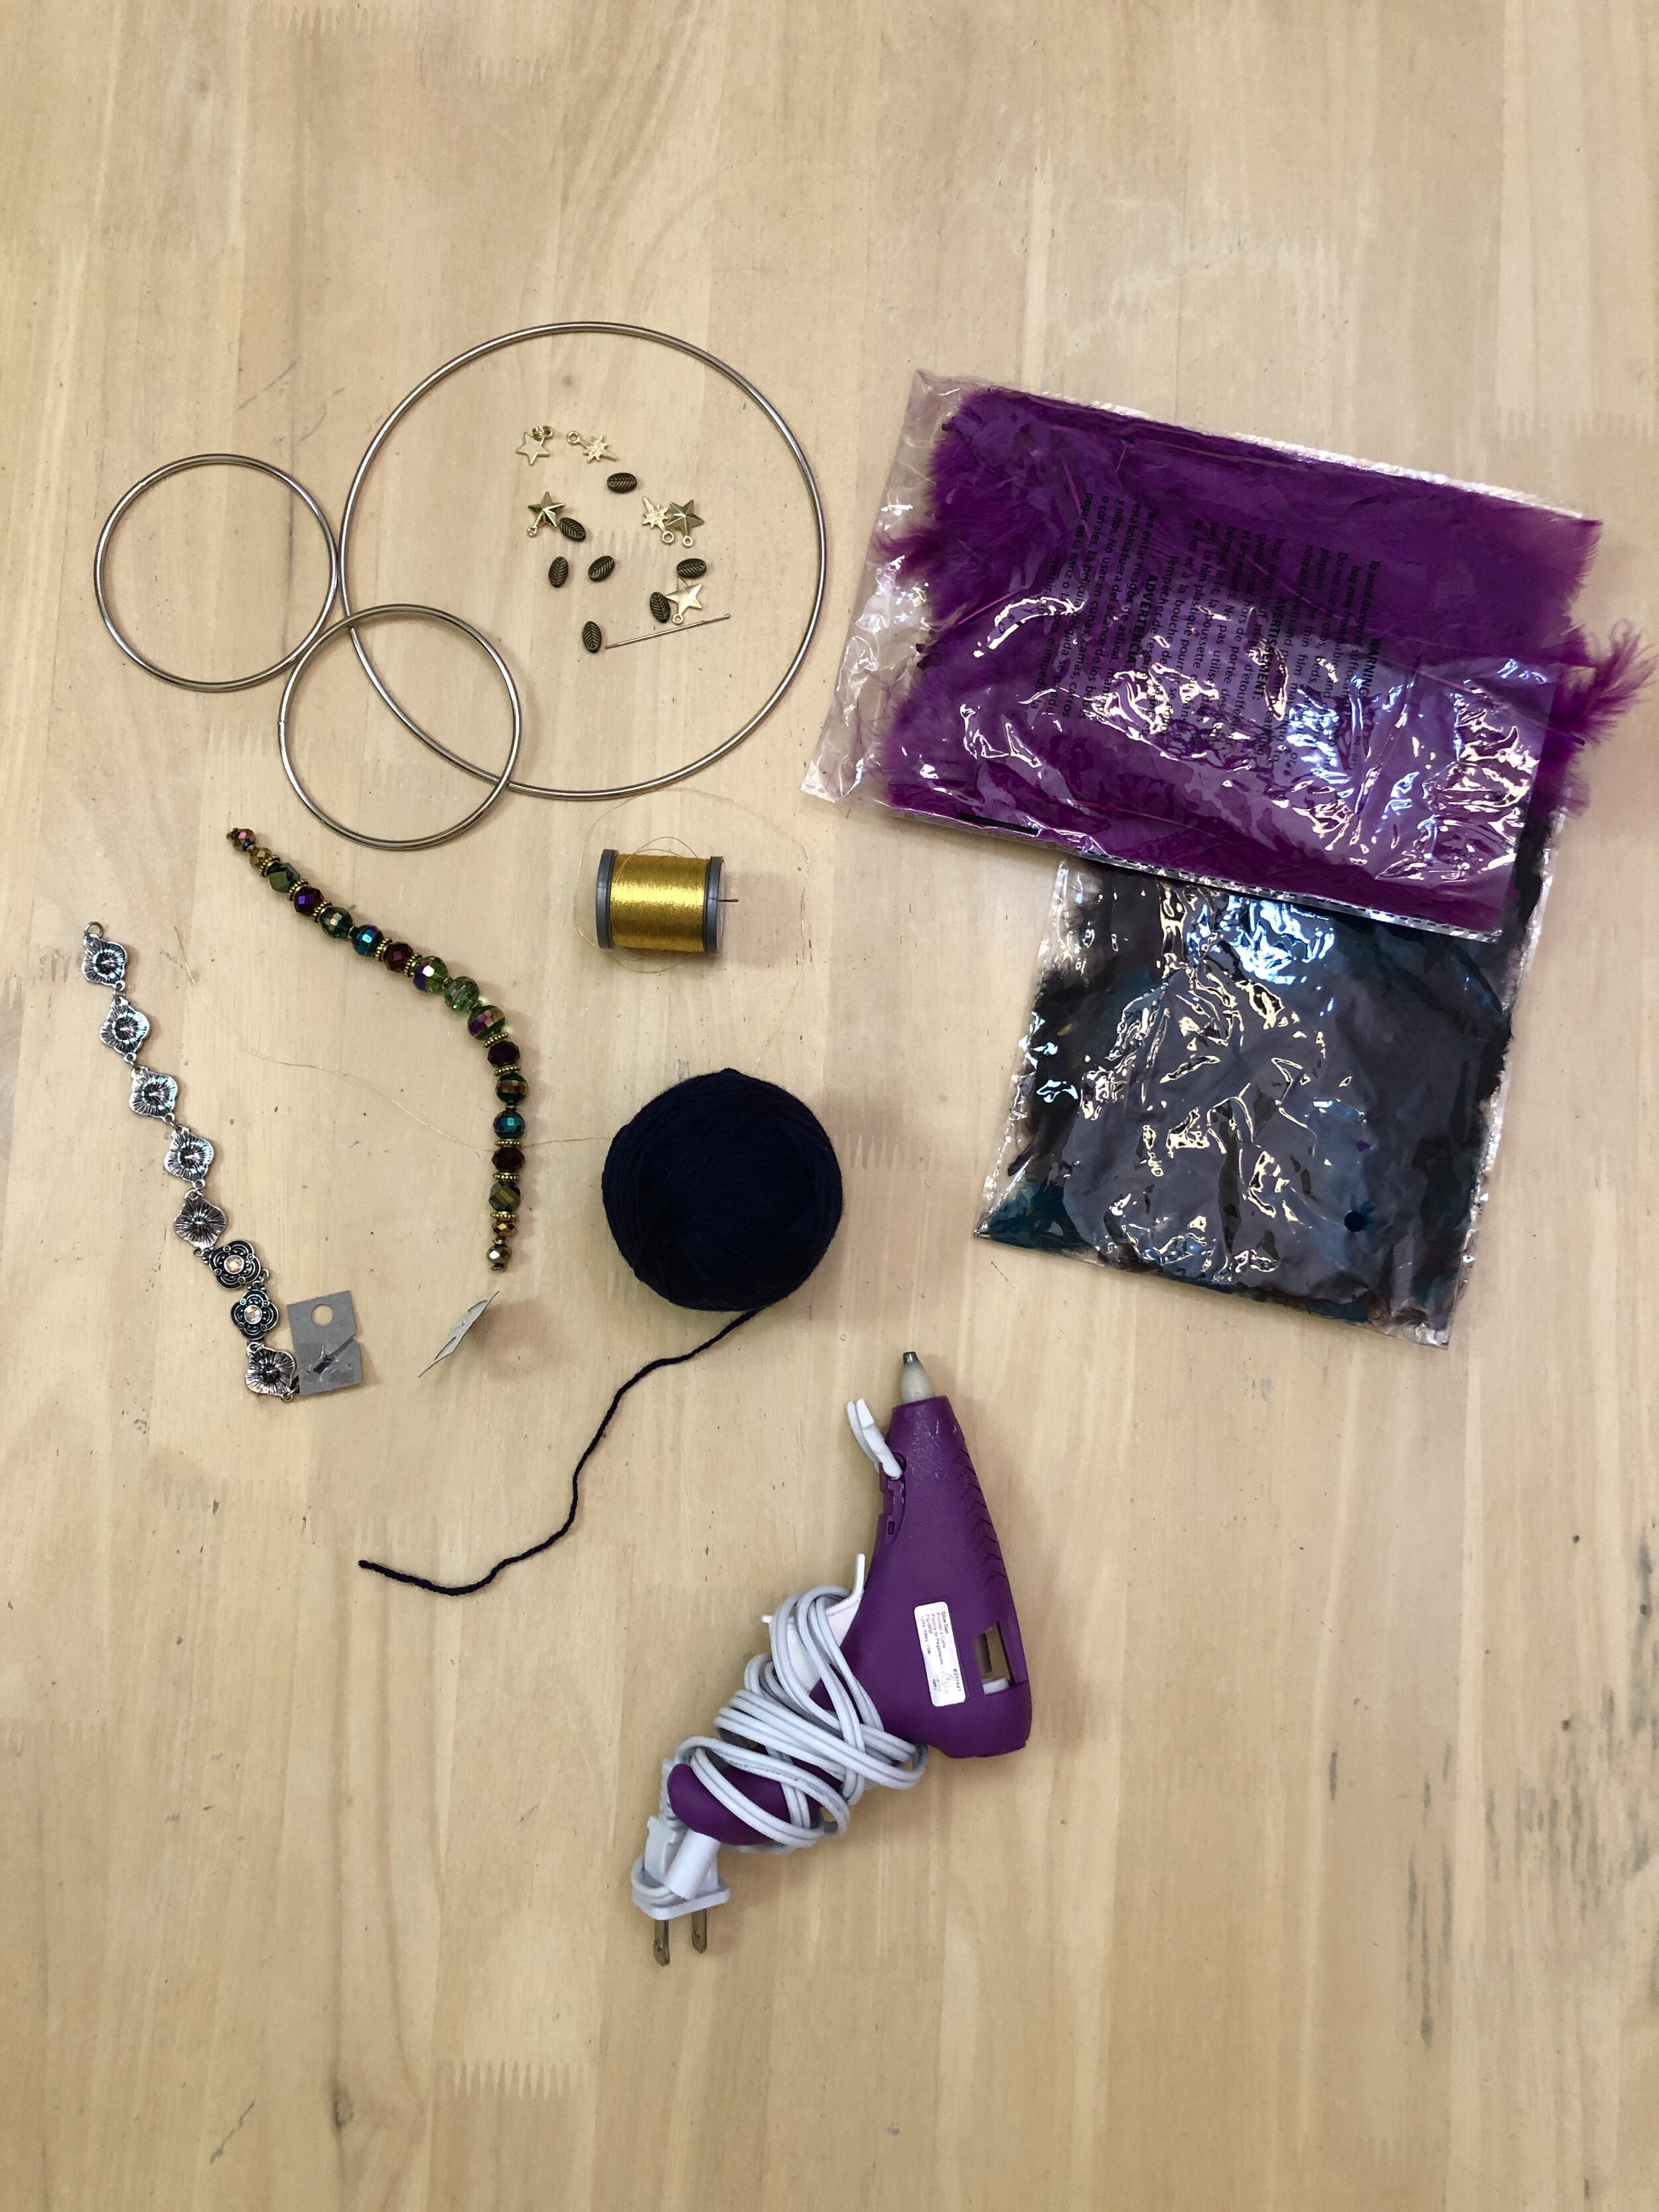
Supplies:
One large round hoop. Can be metal or wood
Two smaller hoops
Thick yarn
Needle
Thick thread
Feathers
Beads and charms
Hot glue gun and hot glue
Note: This will take a while. I usually make owl dream catchers over a few days while I watch TV.
Notes from Example
I used 6 inch big hoop
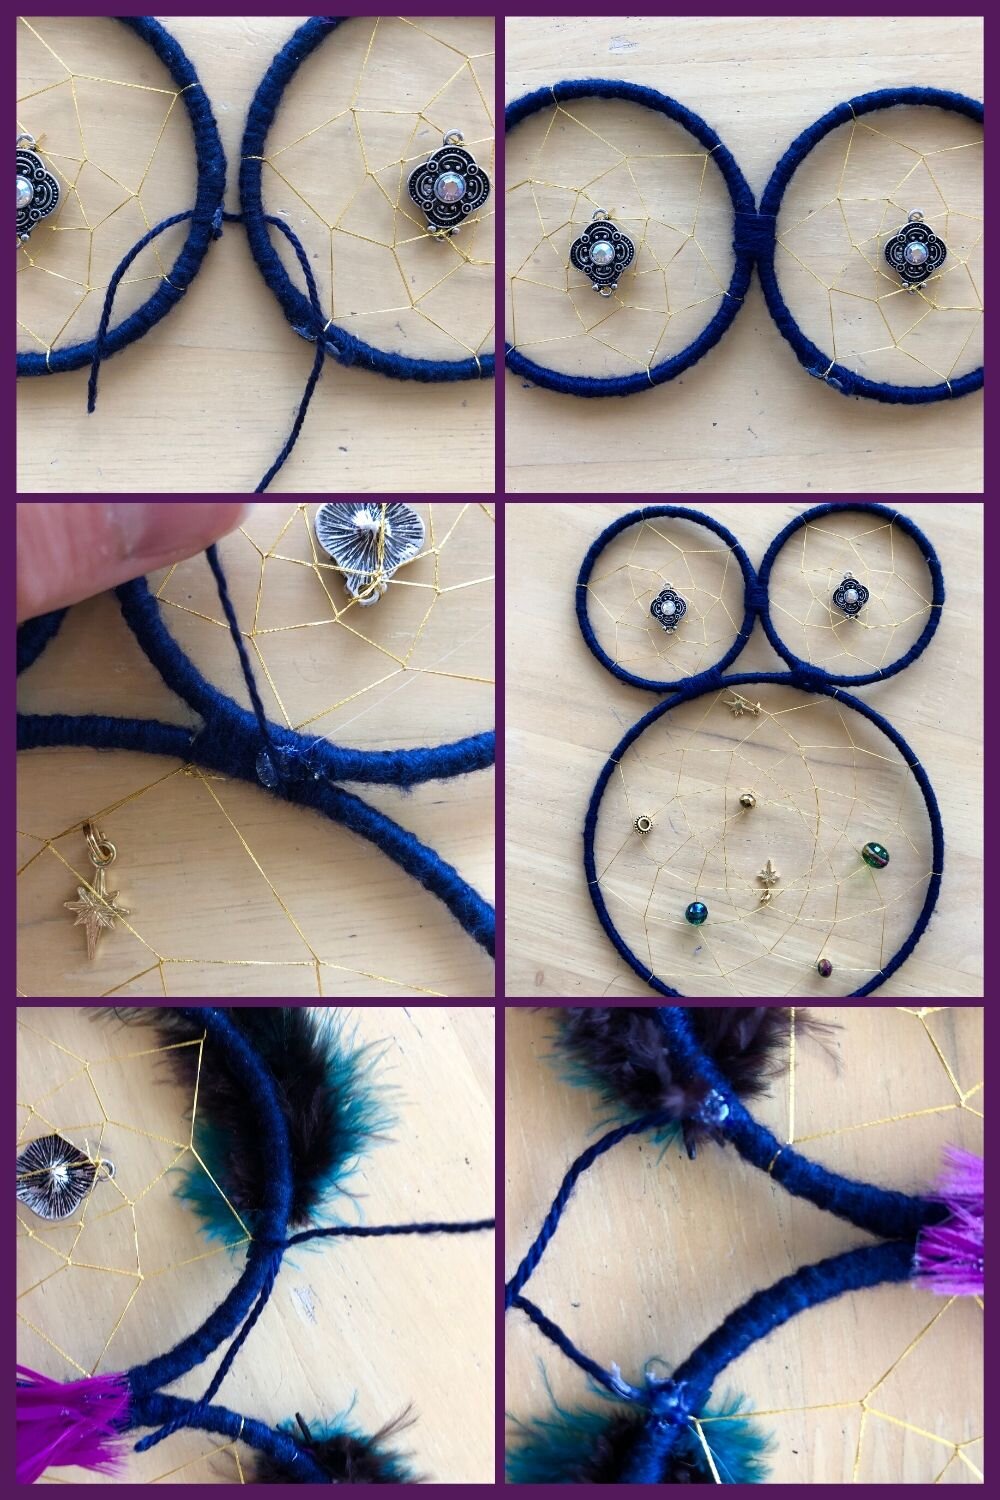
I used 3 inch small hoops
My yarn was leftover from another project and super thin, which meant it took forever to wrap
My thread is thinner than I’d like, so I doubled it
Part 1:
1. Put a dot of hot glue on the big hoop.
2. Press the end of the yarn in the glue.
3. Wrap the yarn around the hoop.
Tip: Wrap the yarn tightly.
4. Complete wrapping the hoop and tie off the yarn.
5. Add a drop of hot glue to keep the yarn from unraveling.
6. Repeat for the two smaller hoops.
Part 2:
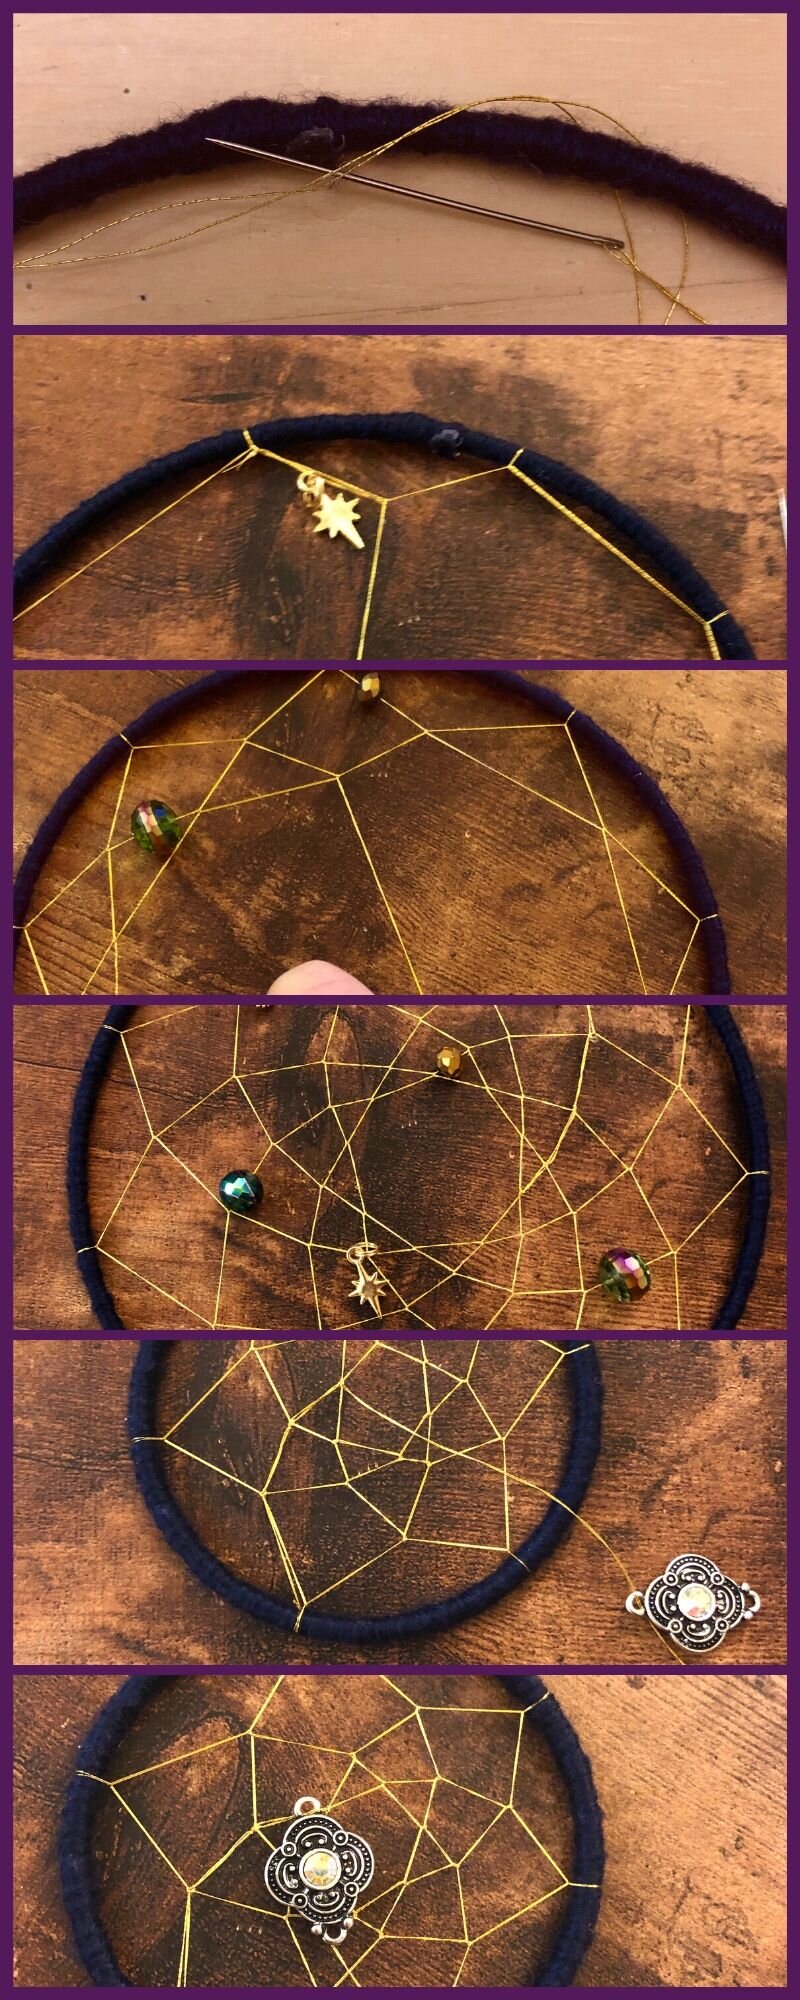
7. Thread the needle. I doubled my thread, so I pulled out a bunch and tied the ends together.
8. Tie the thread around the hoop.
9. Move over and tie the thread around the hoop again.
Tip: You don’t have to tie an actual knot. You can loop the thread around hoop (or itself) like I did. Or tie a knot.
10. Repeat until you’ve gone all the way around the hoop keeping the ties as evenly spaced as possible. I did 9 ties on the big hoop and 6 on the small ones.
Tip: Keep the thread TIGHT as you weave.
11. Add beads and charms wherever you wish as you weave.
12. Tie the thread at the first spot again to make a circle.
13. Tie the thread in the middle of the first line of thread.
14. Then tie the thread in the middle of the second strand and so on.
15. Repeat until you have as many rounds of thread as you’d like.
16. Tie the thread in place and cut off the excess.
17. Repeat for the two smaller hoops.
18. Don’t add charms to the smaller hoops until the end.
19. Thread whatever bead or charm you’d like to use for the eyes into the center of the dream catcher and tie it in place.
Part 3:
20. Use a piece of yarn to wrap to the two eye dream catchers together.
Tip: Wrap around the hot glue from earlier to hide it.
21. Tie off the yarn and add a dot of glue to the back.
22. Repeat to wrap both eyes onto the body hoop.
23. Tie a piece of yarn around the upper eyes to hang your dream catcher.
24. Add a dot of hot glue to keep the tie in place.
Note: I forgot to do this here. It’s much easier to add the hanger strand before you glue the feathers in place.
Part 4:
25. Choose 3-ish feathers and use the thread to wrap them together.
26. Tie the thread in place with plenty of length left.
27. String beads and charms if you wish.
28. Tie the feathers and beads to an upper side of the big hoop. This will be a wing.
29. Add two more strands of feathers and beads.
30. Repeat on the other side, so you have three on each side.
31. Hot glue a feather to the top of each smaller dream catcher.
32. Add an optional second a third feather to the owl’s eyebrows.
33. Hot glue a small feather in between the eyes to make a beak.
Note: The feather is glued to the back of where the eyes are tied together and pokes out to the front of the face
34. Hang and enjoy your owl dream catcher!
And that’s how you make an owl dream catcher. I’d love to see yours. You can tag me on your social media or send me a pic via my contact page. If you want, I’ll add you picture and credits to this blog post.
To make a regular dream catcher, only make the big hoop with the charms and tie three strands of beads and feathers to the bottom.



Caitlin Berve is the author of When Magic Calls: A Collection of Modern Fairy Tales and currently working on a fantasy novel involving an arranged marriage, damsels who save themselves, and non-human shape-shifters. Through her company Ignited Ink Writing and MFA, she edits other people’s novels, creates video tutorials, teaches, and writes. Caitlin seeks to fill the world with the kind of writing that lingers with readers, pet all the fluffy and scaly animals she can, and find magic in modern times.